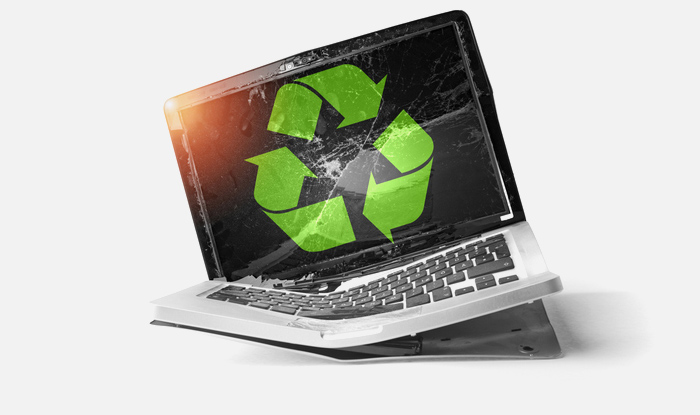
What Is Laptop Recycling?
Laptop recycling is the process of collecting, dismantling, and reprocessing old or unwanted laptops so their materials can be reused or disposed of responsibly. When you recycle a laptop the right way, you keep harmful components out of landfills while recovering valuable metals and parts. As a result, you reduce environmental damage and lower demand for newly mined raw materials.
- E-waste: Discarded electronics (laptops, phones, tablets) that need specialized handling.
- Refurbishing: Repairing and restoring a laptop so it can be reused before recycling.
- Data sanitization: Securely removing sensitive data from storage devices.
- Landfill diversion: Keeping electronics out of landfills through reuse or recycling.
- Rare earth metals: Scarce materials in electronics that are expensive and damaging to mine.
- Hazardous materials: Substances like lead or mercury that can harm people and ecosystems.
- Responsible recycling: Recycling through certified facilities that follow safety and environmental standards.
- Circular economy: Reuse and recycling systems that keep materials in circulation and reduce waste.
Why Recycle an Old Laptop?
When a laptop reaches the end of its useful life, disposal choices matter. If you toss it in the trash, it adds to the e-waste crisis, wastes recoverable resources, and increases data security risk. In contrast, recycling helps recover metals, manage hazardous materials, and protect personal or business data.
- Donate if it still works, is usable, and you can wipe it securely.
- Refurbish/remarket if it has resale value (common in corporate refresh cycles).
- Recycle if it’s broken, outdated, too slow, or unsafe to reuse.
Businesses need to dispose of laptops via certified companies because careless laptop disposal creates real-world harm:
- It accelerates the e-waste problem. Discarded laptops represent a major share of electronics waste, and most e-waste still goes unrecycled.
- It increases environmental impact. The world produces tens of millions of metric tons of e-waste each year, and only a fraction is recycled.
- It creates cybersecurity threats. Laptops often retain sensitive data even after “deleting” files. Without secure handling, that data can be recovered.
- It wastes valuable materials. Devices contain metals like gold, silver, and cobalt that are costly to mine and valuable to recover.
- It increases energy and extraction costs. Recycling materials reduces the energy and environmental burden of sourcing new resources.
To recycle responsibly, use a documented process and a trusted partner. For business-grade services, start here: proper laptop disposal and recycling.
How to Recycle a Laptop: A Six-Step Process
Use this checklist anytime you need to recycle a laptop. It’s designed to reduce data risk first, then make disposal simple.

Step 1: Back Up Important Data
First, move everything you might need later to a secure location. This step matters most for work laptops, tax files, or accounts tied to banking and passwords.

- Cloud storage: Google Drive or Dropbox for everyday files.
- External storage: Best for large files or limited cloud space.
Then, open a few files from the backup to confirm the transfer worked. That quick check prevents painful surprises later.
Step 2: Deactivate Paid or Licensed Software
Next, deactivate licenses tied to the device. Otherwise, you may lose access or pay again.
- Microsoft Office
- Adobe products
- QuickBooks
- Paid antivirus tools
If you’re unsure, check the vendor’s support page for “deactivate device” instructions. Most only allow a limited number of activations.
Step 3: Clear Browsing Data and Sign Out
After that, remove browser traces that often include logins, cookies, and saved passwords. This step reduces the chance of account access if anything is left behind.

- Clear browsing and download history
- Delete cache and cookies
- Sign out of key accounts
- Remove saved passwords
Step 4: Choose a Hard Drive Strategy (Wipe or Remove)
Now decide how you’ll handle the storage device. Deleting files is not enough, because data can still be recovered. If you want a deeper guide, use this: hard drive disposal guide.
Option 1: Use data-wiping software
Wiping overwrites the drive so old data becomes unreadable. Keep these points in mind:
- HDDs and SSDs require different tools.
- HDDs often use tools like DBAN.
- SSDs often require manufacturer tools (example: Samsung Magician).
- Check drive type in Windows Device Manager or macOS System Information.
Wiping can take hours. If time is tight, removal may be easier.
Option 2: Remove the hard drive
If wiping feels too technical or the drive is damaged, remove the drive and recycle the laptop without it.
| Situation | Recommended action |
| Drive works and you want to reuse it | Use an adapter to turn it into an external drive |
| Drive is damaged or unusable | Use a certified data destruction service |
Step 5: Factory Reset the Laptop
Once you’ve addressed storage, reset the device to factory settings. This step removes remaining user profiles and restores default configuration.
Windows 11
- Settings > System > Recovery > Reset this PC
- Reset PC > Remove everything > Local reinstall
- Change settings > Clean data > Confirm > Next > Reset
Windows 10
- Search “Reset this PC” > Get Started
- Remove everything > All drives
- Local reinstall > Change settings
- Remove files and clean the drive > Reset
Windows 8
- Windows + i > Change PC settings
- Update and recovery > Recovery
- Remove everything > Get started
macOS Monterey
- Apple menu > System Preferences
- Erase All Content and Settings
macOS Ventura (and later)
- Apple menu > System Settings
- General > Transfer or Reset
- Erase All Content and Settings
Step 6: Choose a Certified Recycler or ITAD Partner
Finally, pick a recycler that can document what happens to your device. This matters most for businesses, schools, and healthcare software providers. Use this checklist to compare providers: guide to finding a certified ITAD partner.
Look for:
- Certified e-waste handling
- Documented data destruction policies
- Asset remarketing or refurbishment programs
If pickup matters, choose a partner that offers scheduled logistics. That removes friction and improves compliance. You can start here: e-waste pickup services.
Contact Us for E-Waste Pickup
Laptop Recycling Options: Which Path Makes Sense?
Not every laptop should take the same path. Choose based on device condition, data sensitivity, and whether you want value recovery.
1) Corporate ITAD (IT Asset Disposition)
ITAD works best for organizations retiring multiple laptops. It combines chain-of-custody, secure data handling, and value recovery through refurbishment or resale. For revenue-focused programs, see: how to monetize retired IT assets.
Why it works
- Scales to bulk device refresh cycles
- Supports certified data destruction and documentation
- Improves audit readiness through reporting and tracking
- Enables remarketing for financial recovery
2) OEM Take-Back Programs
Many manufacturers offer trade-in or take-back options. They can be convenient, but always wipe data first and confirm your model qualifies.
3) Donation
Donation is great when a laptop is still usable. It extends device life and supports communities. Before donating, wipe data and complete a factory reset.
| Option | Best for | Data security | Environmental benefit | Value outcome |
| Corporate ITAD | Businesses and bulk devices | Very high | High | Financial recovery possible |
| OEM take-back | Brand-specific devices | Moderate to high | Moderate to high | Trade-in credit or convenience |
| Donation | Working personal laptops | Depends on your wipe | Very high | Community value |
Whichever path you choose, keep the goal the same: reduce waste and protect data. If you’re weighing the tradeoffs, this perspective helps: e-waste: recycle or refuse.
Global Overview and Approaches to E-Waste Disposal
Once devices leave our homes and offices, they usually enter one of three streams: formal recycling, informal recycling, or landfilling. Countries that perform well tend to combine legislation, convenient collection, and producer responsibility programs.
For a US-focused compliance view, use: e-waste legislation and compliance updates.

Related E-Waste Recycling Guides (Internal Links)
- Rethink e-waste management: the 3 Rs
- Designing for a second life: repurposed manufacturing
- Turn e-waste eco-friendly: upcycle and reuse
- Planned obsolescence and the e-waste problem
- Responsible tech choices for 2026 and beyond
- How tech companies can solve e-waste problems
- E-waste as an opportunity
- Reasons to recycle e-waste
To Sum Up
Laptop recycling doesn’t need to feel complicated. When you back up your data, wipe or remove the drive, and choose a certified recycler, you protect your privacy and keep valuable materials out of landfills.
If you want a simple, secure option, Hummingbird International can manage pickup, processing, and documentation so you don’t have to.
FAQs
These are some of the most common questions people ask about laptop recycling.
1) How do I remove the hard drive from a laptop before recycling it?
Power off the laptop and unplug it. Remove the bottom screws, open the casing carefully, and locate the drive. Then unscrew the drive bracket and lift the drive out gently. If you’re unsure, use a repair guide for your model or choose a recycler that offers documented data destruction.
2) Should I donate an old laptop or recycle it?
Donate it if it still works, feels usable, and you can securely wipe it. Recycle it if it’s broken, outdated, or too slow to be practical. Recycling is also better when repairs cost more than the device is worth.
3) How can I make sure my personal data is secure before recycling a laptop?
- Back up important files
- Sign out of accounts and deactivate licenses
- Clear browser history, cache, and saved passwords
- Wipe the drive (or remove it)
- Factory reset the laptop
4) What happens to a laptop after it reaches a recycling facility?
Facilities inspect devices for reuse first. If reuse is possible, they refurbish and remarket. If not, they dismantle the laptop, recover metals and plastics, and handle hazardous components safely. Certified providers also document data wiping or destruction.

Leave a Reply