Retired drives can pile up in storage rooms, could be sent to unverified recyclers, or destroyed using outdated, ineffective methods. These habits expose businesses to severe risks like data breaches, identity theft, IP loss, environmental harm, and million-dollar fines.
This guide covers all you need to know about hard drive disposal, from e-waste management to upholding ITAD standards and keeping critical data safe.
- What is Proper Hard Drive Disposal?
- Data Destruction vs. Physical Disposal
- How to Choose the Right Disposal Method
- Step-by-Step Process for a Hard Drive Disposal Strategy
- Work with a Cerified ITAD Partner
- FAQs
- 1. What is the best way to dispose of hard drives?
- 2. Why consider certified recyclers for IT asset disposal?
- 3. How should companies manage drives internally before disposal?
- 4. Can SSDs be wiped/reused or should they always be physically destroyed?
- 5. How can companies create a lasting hard-drive disposal strategy?
What is Proper Hard Drive Disposal?
This is a process to get rid of a hard drive in a way that prevents anyone from recovering the data on it and results in its components being disposed of as e-waste. Since it retains sensitive information (passwords, financial data, personal files, business records), proper disposal is important for privacy and security.
Processes of Hard Drive Disposal
The disposal process should lead to the device being completely destroyed or rendered unrecoverable according to industry standards.
Here are the main processes for hard drive disposal.
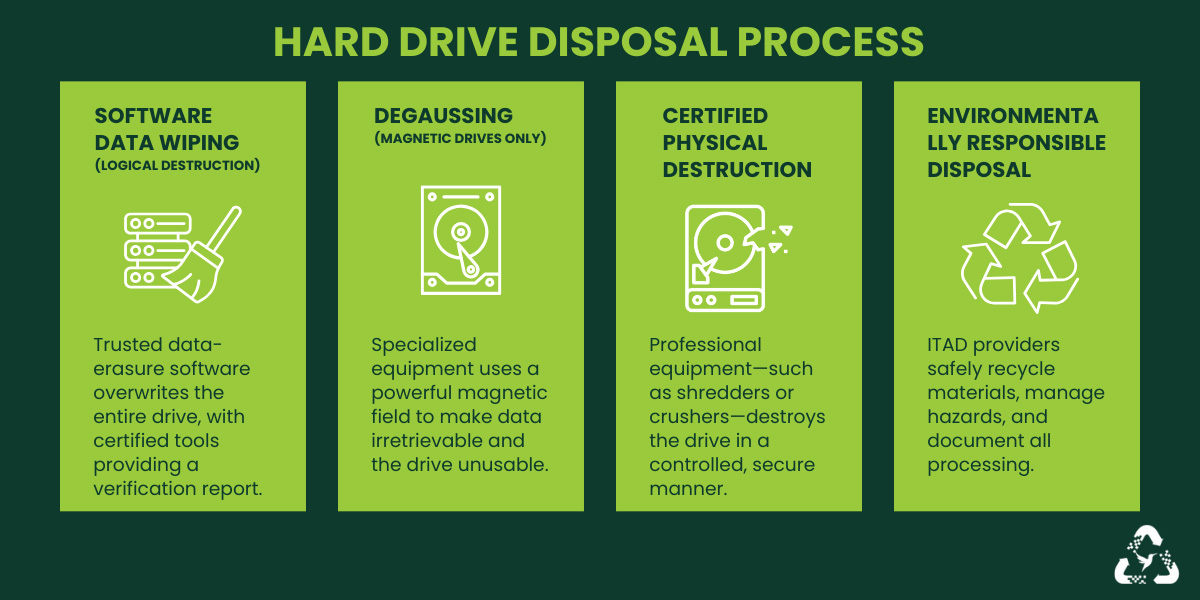
Software Data Wiping (Logical Destruction)
Use trusted data-erasure software that overwrites the entire drive. Certified tools generate a report verifying that data was wiped.
Degaussing (Magnetic Drives Only)
A commercial ITAD provider has specialized machinery that uses a strong magnetic field to render the data irretrievable and the drive inoperable.
Certified Physical Destruction
Companies with proper equipment destroy the drive in a controlled way, such as shredding, while following environmental and data-security regulations.
Environmentally Responsible Disposal
Hard drives contain metals, circuit boards, and materials that must go to an e-waste recycler, not into regular trash. So an ITAD service provider will:
- Separate recyclable materials
- Handle hazardous components according to environmental rules
- Provide documentation of recycling or destruction (for businesses)
It is also very important to differentiate between data destruction and physical disposal for hard drive disposal. Both these procedures are essential and must work together to reduce liabilities.

Types of Drives in Modern Businesses
Most companies now manage a mix of storage media, including:
- Traditional Hard Disk Drives (HDDs): Mechanical drives that are common in desktops, servers, POS systems, and older laptops.
- Solid State Drives (SSDs): Fast, modern storage used in laptops, servers, and workstations. Harder to wipe and destroy as they have a distributed memory.
- Hybrid Drives (SSHDs): Combining SSD cache with HDD storage.
- Enterprise Storage Drives: RAID arrays, SAN/NAS components, and backup systems.
Risks of Improper Hard Drive Disposal
Each type of hard drive requires its own disposal methods. Improper disposal creates severe vulnerabilities:
-
Data breaches
Old drives can contain employee or personal credentials, emails, financial records, tokens, logs, and customer data. All of these are recoverable and a single leaked drive can compromise an entire organization.
-
Identity theft
Personally identifiable information (PII) such as employee records or customer data can lead to fraudulent activity.
-
Intellectual property loss
Hard drives also have R&D files, prototypes, source code, and proprietary information. If recovered, they can cause financial loss and damage.
-
Regulatory non-compliance
Laws like GDPR, HIPAA, GLBA, SOX, FERPA, PCI-DSS, and emerging state privacy acts have imposed heavy penalties for data leaks, no matter what they are caused by.
-
Intellectual property loss
Hard drives contain hazardous substances like lead, mercury, cadmium, and brominated flame retardants, which can contaminate soil and water.
Data Destruction vs. Physical Disposal
A drive isn’t ‘disposed of’ until its data is irrecoverable and the physical device is handled responsibly. Many organizations mistakenly assume that either wiping data or discarding hardware is sufficient. In reality, secure hard drive disposal requires a two-step approach:
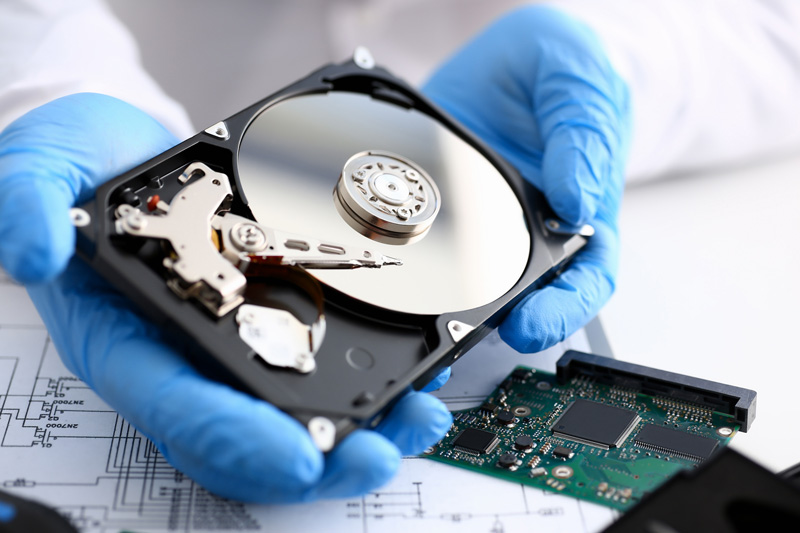
- Data Destruction: Making sure that information on the drive cannot be reconstructed using forensic tools.
- Physical Disposal: Following a process so that hardware doesn’t become a source of waste, contamination, or unauthorized data access.
It is also essential to evaluate disposal methods based on:
- Drive type (HDD vs. SSD vs. hybrid)
- Data sensitivity (public, confidential, regulated)
- Compliance frameworks (NIST 800-88, GDPR, HIPAA, etc.)
- Environmental and sustainability goals
- Asset recovery value
Data Sanitization (Logical Erasure)
This is known as wiping, overwriting, or logical erasure, where data is removed by overwriting every sector on a drive with new information. This is mainly based on standards like NIST SP 800-88 Clear or Purge.
It is effective in many situations, such as:
- Drives being reused internally (e.g., redeploying laptops to new employees)
- Devices being resold, donated, or repurposed
- Organizations prioritizing circular economy, sustainability, or cost savings
- Situations where full drive functionality must be preserved
When businesses are looking into data sanitization for hard drive disposal, it is important to consider the advantages that include:
Environmentally Responsible
Sanitization keeps drives in circulation, reducing e-waste and enabling resource recovery.
Cost-Effective
It’s far cheaper than shredding or replacing drives, especially at scale.
Preserves Device Value
Companies can extract ROI by reselling or reusing sanitized equipment.
Risks/Limitations
Sometimes, there can be sudden issues during or before the process.
Human or Tool Misconfiguration
Incorrect wiping procedures can leave data sectors untouched, making recovery possible.
Not Ideal for SSDs in High-Security Environments
These use wear-leveling and distribute data across memory cells so overwriting may not reach all areas. This could make sanitization unreliable for highly confidential data.
Slow for Large or Failing Drives
Older or failing drives may not complete overwriting processes successfully.
Many businesses adopt NIST 800-88 Clear (logical erasure) or Purge (enhanced sanitization) standards for internal reuse, device rotation, or resale. But they can switch to physical destruction for end-of-life drives or highly regulated data.
Physical Destruction
These methods are for physically disrupting the storage media so severely that reconstruction is impossible, even with forensic recovery. This is the right choice for hard drive disposal when:
- Data is highly confidential, regulated, or related to intellectual property
- Drives have failed or are no longer functional
- The organization operates under strict security frameworks (government, defense, finance)
- Compliance demands proof of destruction, not just erasure
Degaussing
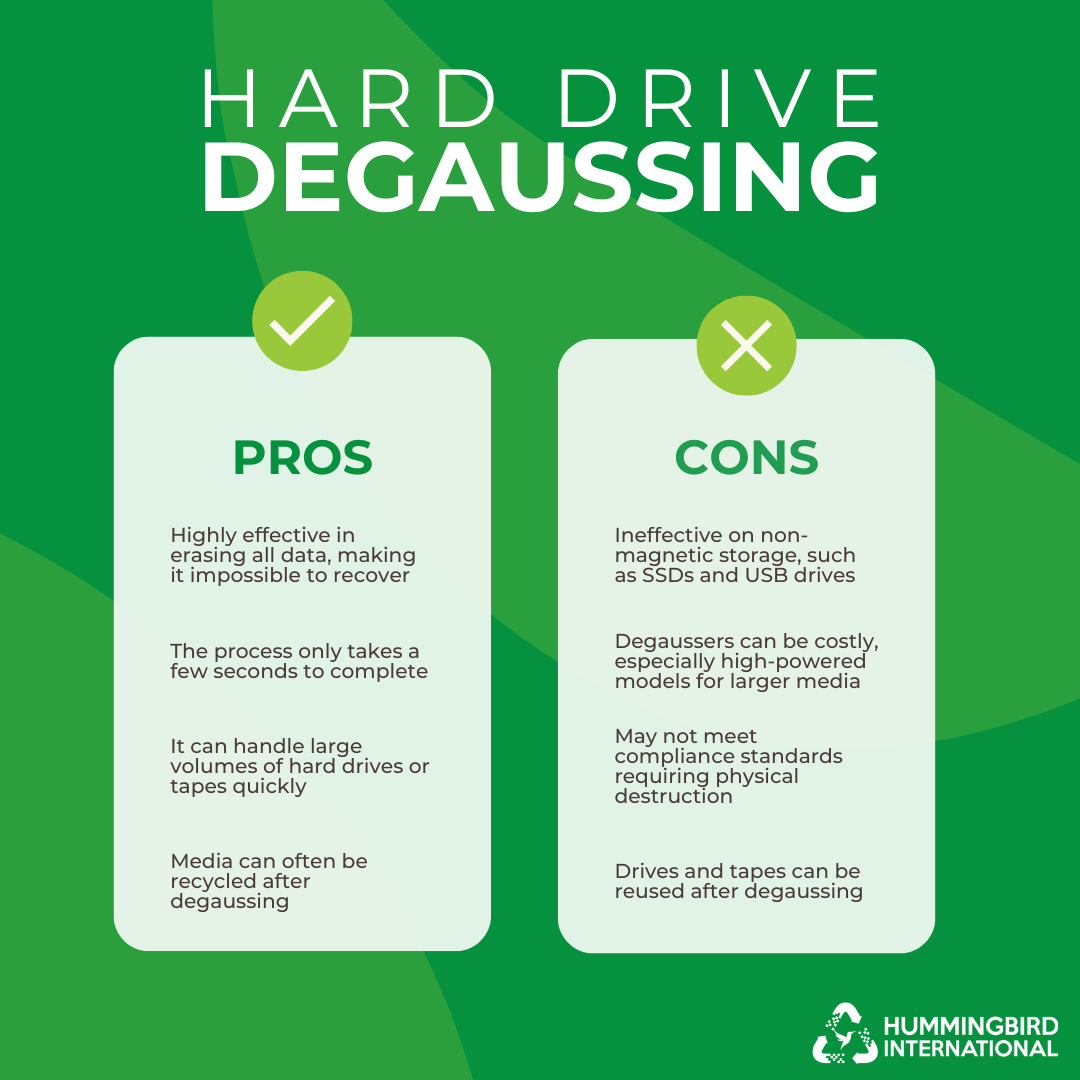
This exposes magnetic drives to a strong magnetic field that damages stored data beyond recovery. Here’s how it works:
- A degausser generates a high-intensity magnetic pulse
- This pulse demagnetizes the platters, scrambling all data patterns.
- The drive becomes permanently inoperable.
The process is best for high-security hard drive disposal in enterprises, banks, or government agencies, as well as drives that cannot be reused. Degaussing has quite a few benefits like:
- Fast and highly effective for HDDs
- Approved for high-security use when using certified degaussers
- Instant data destruction without needing software or working hardware
Limitations
- Does NOT work on SSDs or flash storage
- Drive becomes unusable, requiring physical recycling afterward
- High-grade degaussers are expensive and require calibration
- Not suitable for hybrid drives (SSHDs)
Shredding / Crushing
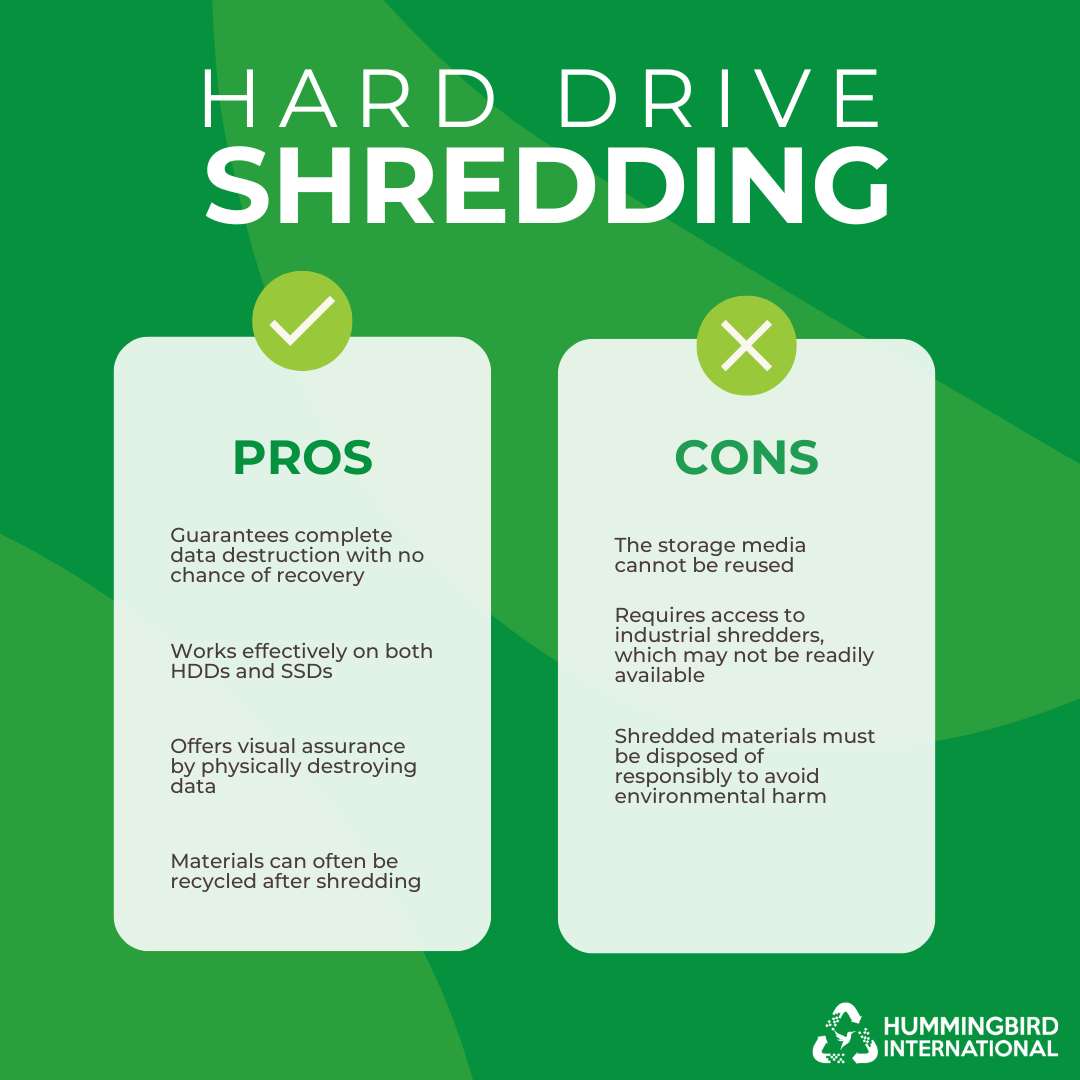
They are two of the most widely used destruction methods for mixed drive types.
- Shredding
Industrial shredders cut drives into small pieces. For SSDs, the particle size must be smaller (2–10 mm) to make sure no chip survives intact.
- Crushing
Hydraulic presses or automatic crushers puncture, crack, and deform drives. This is mostly used on-site before shredding.
Both of these processes have core advantages such as:
- Works for both HDDs and SSDs (with proper particle-size shredding)
- Most reliable for complete and verifiable destruction
- Fast at scale, going up to thousands of drives per hour
Businesses can consider shredding and crushing in situations that require:
- Final disposal of enterprise drives
- Proof of destruction for compliance
- Failed or non-functional drives
Limitations
- Destroyed hardware cannot be reused
- Requires licensed recyclers to prevent e-waste mismanagement
- Off-site shredding requires strict chain-of-custody tracking
Disintegration / Pulverizing
Drives are fed into high-speed disintegrators that grind them into fine particles or dust, far beyond standard shredding. This physical hard drive disposal method is used by defense, military, and advanced government agencies.
With disintegration or pulverizing, businesses gain advantages like:
- Maintain the highest level of security available
- Ensure complete elimination of all media components
- Meet strict national security disposal standards
Mostly, the methods work for businesses looking to destroy hard drives that have classified data or end-of-life SSDs with sensitive encryption keys. These are used for defense-sector IT equipment as well.
Limitations
- Expensive and not common for SMEs
- Requires specialized, permissioned facilities
- Not necessary for normal commercial data
Method Comparison
| Method | Best For | Strength | Possible Reuse | What to Know |
|
Wiping (NIST 800-88 Clear/Purge) |
Reuse, redeployment, resale | High (if performed correctly) | Yes | SSDs require advanced purge methods, ineffective if misconfigured, best for functioning drives |
|
Degaussing |
Destroying HDDs with sensitive data | Very high | No | Works only for magnetic HDDs, permanently destroys drive electronics, not effective on SSDs or hybrid drives |
|
Shredding / Crushing |
HDDs & SSDs at end-of-life | Very high | No | Requires proper SSD particle size (<10mm), must use certified e-waste recyclers, works even for failed drives |
|
Disintegration / Pulverizing |
High-security and government-grade destruction | Extremely high | No | Reduces drives to dust, is expensive, used for classified or top-secret devices, typically off-site in secure facilities |
How to Choose the Right Disposal Method
For a hard-drive disposal method, businesses need to consider three foundational criteria like:
- Type of drive
- Sensitivity of the data it contains
- Regulatory landscape governing data protection
Making the wrong choice can lead to non-compliance, data breaches, and serious financial or legal consequences.
Determine Drive Type
Different storage devices or drives respond to disposal methods in various ways. So match the type to its method.
HDD (Hard Disk Drives)
Since these store data magnetically on spinning platters, the go-to disposal processes can be:
- Wiping – effective when drives are functional and intended for reuse
- Degaussing – neutralizes magnetic fields, making data unreadable but also rendering the drive inoperable
- Shredding – guaranteed method for end-of-life destruction regardless of drive condition
SSD (Solid State Drives)
- Degaussing does not work because SSDs don’t use magnetic storage
- Shredding, crushing, or pulverizing is required to make sure all memory chips are destroyed
- For very sensitive environments, pulverizing into dust-sized particles is preferred
Hybrid Drives (SSHD)
Such drives combine magnetic platters with flash memory and it’s important to understand these factors to dispose of them securely:
- Only physical destruction methods (shredding, crushing, pulverizing) are considered reliable
- Logical wiping cannot guarantee complete data elimination from both storage layers
Match the Method to Data Sensitivity
Evaluate how much damage old data could cause if resurfaced. The more sensitive the information, the more aggressive the disposal method should be.
Low to Medium Sensitivity Data
This mostly covers general business files or non-confidential operational data. And the disposal of hard drives can include:
- Wiping (NIST 800-88 Clear or Purge) is usually sufficient
- Sanitization is it allows the asset to be reused internally or resold
- Recycled as e-waste which is both sustainable and cost-effective
High Sensitivity Data
Devices could likely carry customer records, internal IP, financial documents and proprietary research. So pick disposal methods such as:
- Shredding for HDDs and SSDs
- Degaussing can be used for HDDs only
These methods provide a substantially higher assurance level against recovery attempts.
Extremely High Sensitivity Data
Now, this is in the case of government, military, healthcare, fintech and national security. Disposal could be through:
- Pulverizing or disintegration
When in doubt, enterprises should always be on the side of stricter destruction.
Compliance Requirements
Disposal decisions must also prioritize the regulatory frameworks that govern your industry. Many compliance standards require specific data sanitization or destruction methods to avoid breaches.
Most ITAD service providers comply with these regulations when disposing of hard drives securely:
- NIST 800-88: The most widely adopted standard for data sanitization in the U.S. It specifies ‘clear,’ ‘purge,’ and ‘Destroy’ categories and is followed as the baseline for corporate ITAM policies
- HIPAA (Healthcare): Requires verifiable destruction of PHI (Protected Health Information). Physical destruction is also categorized for many device types.
- PCI-DSS (Payment Card Industry): Needs secure destruction of cardholder data and strict chain-of-custody documentation.
- Local or State Data Protection Laws: Many regions (e.g., California’s CCPA) impose additional obligations around secure disposal.
- Internal Governance Policies: Large enterprises maintain stricter standards than external regulations.
Certified Disposal and Recycling
A commercial IT asset disposal (ITAD) or recycler follows strict, audited standards across every step of the disposal process. From pickup to final material recovery, every aspect is safe, secure, and fully documented.
For enterprises and SMEs, this matters for four critical reasons:
1. Data Security
Certified services use approved destruction techniques and provide verifiable documentation such as Certificates of Data Destruction, serial-number logs, and chain-of-custody records. This prevents data breaches, IP loss, unauthorized access to corporate files, and leakage of customer information.
2. Legal & Regulatory Compliance
With global regulations and state privacy laws tightening, organizations must prove that end-of-life drives and devices were destroyed responsibly. ITAD services follow recognized frameworks and keep disposal logs that satisfy regulatory inspections. This reduces the risk of fines, litigation, and compliance failures tied to improper asset retirement.
3. Environmental Safety and Ethical Recycling
Providers opt for environmentally safe dismantling, material recovery, and downstream handling procedures. This avoids hazardous waste being dumped, burned, or processed in informal sectors where toxic chemicals harm workers and ecosystems. It also helps prevent e-waste leakage into regions that lack proper infrastructure.
4. Downstream Vendor Transparency
A certified recycler must prove where every component ends up. This way, you make sure that your hard drives, metals, plastics, and circuit boards never enter gray markets or unregulated processing sites. Downstream traceability protects your brand from being linked to illegal exports or unethical recycling practices.
Key Certifications to Look For
The best ITAD providers hold a combination of certifications such as:
- R2 / R2v3 — Responsible recycling and downstream vendor audits
- e-Stewards — Strict no-prison-labor, no-export standards
- NAID AAA — Verifies secure data destruction
- ISO 14001 — Environmental management systems
- ISO 9001 — Quality management
- ISO 45001 — Occupational safety
For hard-drive disposal, R2v3 + NAID AAA is the strongest combination.
Best Certification Combinations (Quick Guide)
| Use Case | Best Combo | Why |
|
Hard-drive destruction with maximum security |
R2v3 + NAID AAA | Highest verified data-security and strict environmental controls |
|
Strict ESG and ethical recycling requirements |
e-Stewards + ISO 14001 | No export, no prison labor, sustainable processing |
|
Enterprise consistency across global locations |
R2v3 + ISO 9001 | Optimizes predictable, high-quality ITAD operations |
|
Worker-heavy recycling environments |
R2v3 + ISO 45001 | Strong environmental management and worker safety systems |
Step-by-Step Process for a Hard Drive Disposal Strategy
A strong system has day-to-day workflows with risk management, regulatory compliance, and sustainability objectives. Here is a complete breakdown of a how you can implement a hard drive disposal strategy that works with ITAD best practices:
Step 1: Establish a Structured, End-to-End SOP
Every enterprise and SME should create an SOP that covers the entire lifecycle of a drive. It should have everything from the moment it is pulled from service until the final destruction certificate is logged.
Key factors of an effective SOP include:
Decommissioning drives
Track device ownership, serial number, asset tag, user history, and reason for retirement.
Data destruction point or sanitization
Determine if the drive will be wiped (NIST 800-88 Clear/Purge) or physically destroyed (shredded/degaussed). This mostly depends on sensitivity, drive type, and compliance requirements.
Secure temporary storage
Retired drives must be stored in locked, access-controlled rooms or cages, never in open office areas or near regular waste streams.
Labeling and asset logging
Assign a disposal label or barcode and keep a record of the device in a centralized ITAD point. Make sure no drive is untracked at any stage.
Handoff to certified recycler or ITAD partner
Only transfer drives to an R2v3 / e-Stewards / NAID AAA partner who can document downstream tracking.
Record-keeping
Maintain serialized destruction certificates, CoCs (chain-of-custody), wiping logs, ESG summaries and audit trails for 7–10 years at least.
Step 2: Handle Internally before Disposal
Before any hard drive reaches a certified recycler, the internal handling process must be very strict. This is where most breaches occur between removal and pickup. Here are a few aspects to keep in mind:
Secure storage
Use locked bins or steel safes for temporary holding. Restrict access to authorized IT or security staff.
Clear labeling
Tags should include status (retired, wiped, pending destruction), date, and serial number.
Separation
Never mix drives with general office trash, outdated peripherals, or cardboard recycling.
Limited access
Implement badge-controlled rooms and sign-in/out logs for anyone accessing stored drives.
Employee training
Staff must know that drives cannot be taken home, thrown out, or handed to unauthorized vendors. These are common errors that lead to major breaches.
Step 3: Integrate Disposal Cycles Into Long-Term Planning
A strong hard drive disposal strategy treats the process as a repeating, predictable one. It should be a reaction to an emergency, which is why, your program should include:
Regular audits
Quarterly or biannual reviews of drive inventory, including inactive, lost, or aging hardware.
Mass retirement cycles
Coordinate disposal around device refreshes, cloud migrations, or office consolidations.
Disaster recovery decommissions
Include disposal workflows for equipment affected by floods, fires, or data center failures.
Hardware refresh planning
Incorporate disposal schedules with procurement, as this makes end-of-life planning smooth and cost-efficient.
Step 4: Adapt for Remote and Multi-Site Operations
This is a long-term process that cannot work without understanding how hard drive disposal can be integrated across different locations. And that requires:
Centralized logging
All drives, regardless of location, must be a part of a focused digital asset-tracking system.
Standardized shipping and packaging
Remote employees require prepaid, trackable, tamper-proof return kits.
Coordinated pickups
Schedule regional collections to maintain consistency and reduce cost.
Location-specific SOPs
Check local regulations, space restrictions and risk exposure to allow for security across all sites.
Step 5: Future-Proof your Disposal Framework
Hard-drive technologies evolve quickly, and your disposal strategy must change with them. Outdated HDD-focused policies no longer protect organizations using SSDs, NVMe devices, cloud-linked edge hardware, or IoT components.
To future-proof well, consider these practices:
Adopt new SSD sanitization standards
NIST 800-88 Purge and crypto-erase requirements make sure hidden SSD blocks are securely addressed.
Integrate disposal with asset-tracking automation
Use MDM integrations, RFID tags, and automated chain-of-custody logging instead of spreadsheets.
Support hybrid and remote workers
Provide secure return kits, scheduled reminders and documented offboarding workflows.
Move disposal scope beyond PCs
IoT sensors, printers, switches, POS terminals, and industrial machinery all store sensitive data.
Use ITAD data for ESG reporting
Track landfill diversion, remarketing ROI, carbon savings, and materials recovery.
Conduct annual ITAD policy reviews
Update SOPs to reflect regulations, certification changes, and new device categories.
Case Study – 1
A nationwide enterprise operating more than 20 offices had stored old hard drives in closets, drawers, and unsecured storage rooms across its locations.
Challenge:
They previously sent all retired drives and devices directly to destruction, missing opportunities for reuse and losing potential remarketing revenue. They also lacked verifiable environmental reporting to support ESG goals.
Solution:
The company partnered up with an R2v3-certified recycler to manage non-functional drives and recover materials responsibly. It also received ESG-aligned reporting, including carbon savings, landfill diversion metrics, and materials recovery summaries.
Work with a Cerified ITAD Partner
A commercial ITAD service can manage everything from secure on-site handling to certified destruction and transparent downstream recycling. With certifications like R2v3, e-Stewards, and NAID AAA, you can make sure your data never falls into the wrong hands and your e-waste is properly recycled. It is also a good idea to start integrating ITAD into procurement workflow and ESG reporting for internal management as well.
FAQs
1. What is the best way to dispose of hard drives?
For HDDs, certified wiping, degaussing, or shredding are accepted. If SSDs must be disposed, then methods like shredding, crushing or pulverizing will be used. This is mainly because magnetic methods don’t work on flash memory. Businesses handling sensitive data should choose industrial shredding and maintain a chain-of-custody documentation.
2. Why consider certified recyclers for IT asset disposal?
They follow strict standards for data destruction, environmental handling, and downstream accountability. Certifications such as R2v3, e-Stewards, and NAID AAA help make sure your drives are destroyed securely and never dumped illegally overseas.This reduces legal risk and allows for compliance with HIPAA, NIST 800-88 and state laws.
3. How should companies manage drives internally before disposal?
They should be stored in a controlled, secure environment with restricted access. Label and seal containers, separate storage to avoid mixing destruction methods. It is also important to track so that no on-site tampering occurs. Businesses also need to schedule regular disposal cycles (quarterly or according to upgrades).
4. Can SSDs be wiped/reused or should they always be physically destroyed?
SSDs can be wiped using advanced sanitization tools that follow NIST 800-88 Purge-level standards. For low-sensitivity data, certified wiping is acceptable. It is important to consider physical destruction for high-sensitivity or in industries like finance, defense and research.
5. How can companies create a lasting hard-drive disposal strategy?
Consider the how storage technologies change, remote-work challenges, and increasing compliance expectations. Adopt updated SSD sanitization standards, automating asset tracking, and expand coverage to IoT and network gear. Annual policy reviews also add to the security, sustainability, and operational consistency across the organization.

Leave a Reply